Create a group in a private simulation or in the Bourstad Challenge
Schools that join the Bourstad Program may create one or more groups in the Bourstad Challenge and in the private simulations they have created. This section presents the steps to follow.
The creation of a group must be carried out by the Institutional Head of Bourstad within the school.
The steps listed below assume that an Institutional Head has logged into their account and the Institutional Head profile is displayed, which is the case at login.
The creation of groups for the same simulation in a school makes it possible to obtain, for example on the teachers' dashboard, reports for separate groups of a course or for students with different study profiles (eg students of a specialization course Vs students of a complementary course).
-
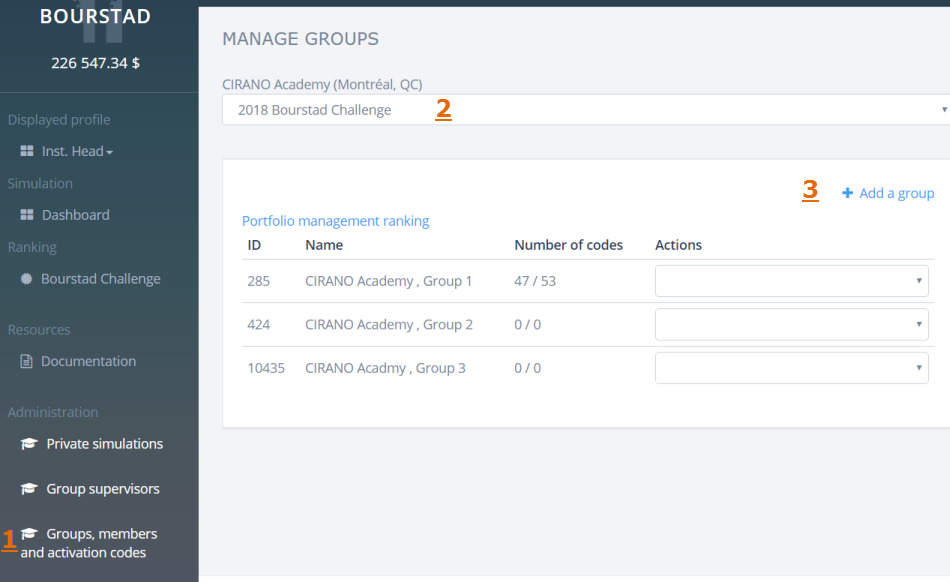
Request the menu option Groups, members and activation codes in the Administration group of the Institutional Head menu
The Manage Groups page is displayed.
-
Select a simulation, the Bourstad Challenge or a private simulation, from the drop-down list.
A table of groups that already exist for this simulation is displayed.
-
Click on the link +Add a group which appears above the table on the right.
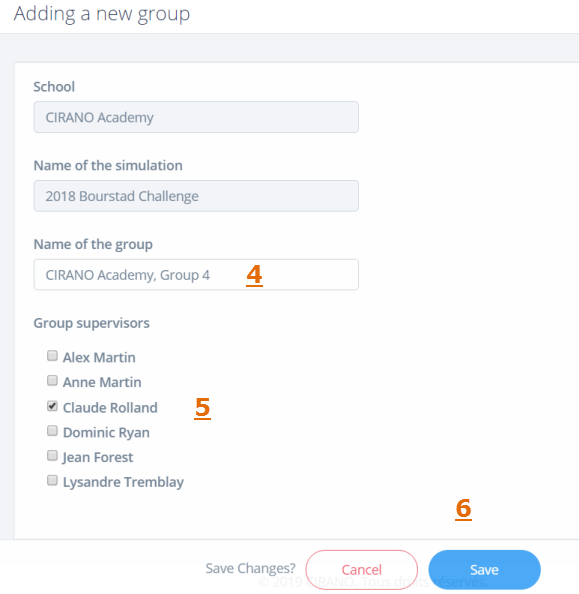
The window Adding a new group is displayed.
-
Specify the name to be assigned to the new group.
Note: The name of a group can be changed using the Edit action in the Manage Groups table.
-
If applicable, assign one or more group supervisors for the new group.
Note: In order to assign group supervisors, one or more group supervisors must have been designated using the Group supervisors function.
-
Save the information for the new group to be created.
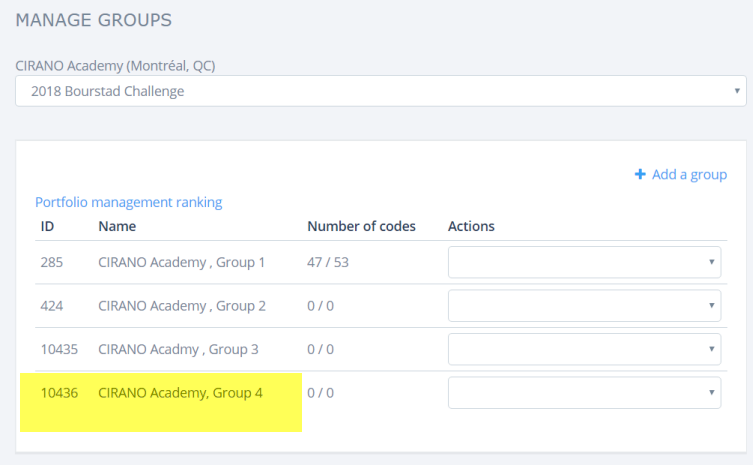
It can then be seen by reselecting the simulation from the drop-down list that a new group has been added.
Figure 3. New group added